What are Excel Surveys?
Excel Surveys are part of the Office Online suite of apps that can be accessed from any device on the web. Excel Surveys are a data collection tool. There is no desktop version of Excel Surveys. It only exists online. Excel Surveys can be used for assessments, surveys, feedback forms, referrals and so much more. Responses are saved in an Excel Online workbook for analysis later.
Getting Started
1. Create a new Excel workbook in OneDrive and name it using the word "survey" in the title.
2. Give your survey a title and a description (this name can be different from the Excel Online workbook file name)
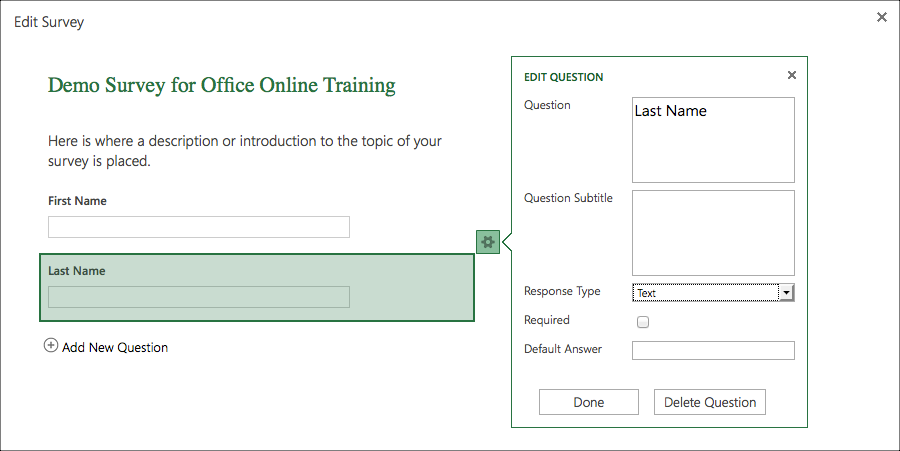
3. Add a couple of "text" questions, one asking for First name, and one asking for Last name.
2. Give your survey a title and a description (this name can be different from the Excel Online workbook file name)
3. Add a couple of "text" questions, one asking for First name, and one asking for Last name.
Excel Survey Question Types
- Text - best reserved for short one or two word answers.
- Paragraph Text - for longer text based answers that require more time and/or space.
- Number - best reserved for responses that can be calculated with math functions to find things like totals and averages
- Date - lets you sort results in chronological order.
- Time - lets you sort results in chronological order.
- Yes/No - you can quickly filter Yes/No responses to see who’s in and who’s out.
- Choice - multiple choice type questions.
Tips for Creating Excel Surveys
- Drag questions up and down to change the order they appear on the survey.
- Think about how you will use the data and frame your questions based on that idea.
- Edit any question by clicking on it and clicking the gear icon to the right of the question.
- Columns in the spreadsheet are built as you add questions to the survey form. Changes you make to the survey form are updated in the spreadsheet, unless you delete a question or change the order of questions on the form. You'll have to update the spreadsheet manually in those cases: delete the columns that go with the questions you deleted, or cut and paste columns to change their order.
Save and Share
When you have finished adding your questions you can click Save and View to see what the survey looks like. This would be the option to select if you were not yet ready to send your survey to others, or wanted to come back and add more later. To re-open or edit a saved survey, click Survey > Edit Survey on the Home ribbon.
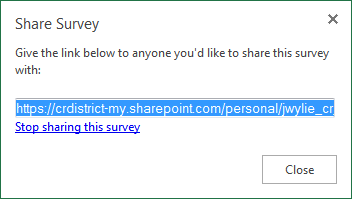
To share your survey with others, you can click Share Survey at the bottom of the editing window, or click Survey > Share Survey in the Home ribbon. This gives you a URL that you can use to send to others. You will also see a link that says Stop sharing this survey - you can use this to close a survey so that it is no longer accepting responses.
If you want to share the spreadsheet data with another person, you would just share the file like you would with any Excel Online workbook, i.e. click Share in the top right-hand corner or go to File > Share.
Submit Your Survey Here!
- Once you have completed your test survey, click here to submit the link for others.
- After you have submitted the URL to your survey, click here to take other people's surveys.
- When you have completed five or more surveys, look at the data that was submitted to your own survey.
Data Analysis
Once you have collected all the data you need you can sort and filter it in Excel Online by selecting your data and choosing to Format as a Table. You can also click Open in Excel in order to use more advanced data tools like conditional formatting.


